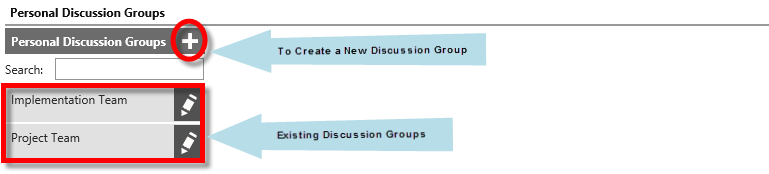
Go to My Settings (Workspace>My Settings) in Global Collaboration and navigate to ‘Personal Discussion Groups’ section.
Within this section, you can edit existing personal discussion groups or create a new one.
Create a new Personal Discussion Groups
1. In order to create a new discussion group, click on '+' icon.

Type the name and click Save. You will be able to add users only after saving.
2. More fields will be displayed after saving.
By default, all user names will be displayed. You can select a business unit from 'Filter by Organisation Link' drop-down to view all users belonging to it. Relevant users will appear underneath.
You can also locate a user by performing a key-word search on his/her name. Type the user's name in 'Name' text-box below 'Filter by Organisation Link' field and press Enter.
Click on 'Select All' tick-box to select all displayed users.
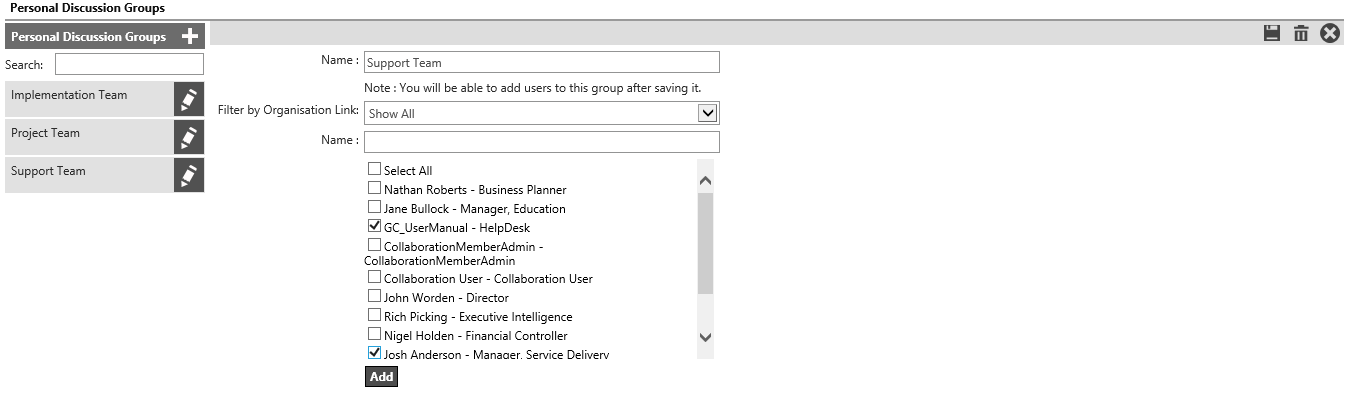
3. Once selections are completed, click 'Add' button.
Member names will appear with an option to 'Delete' if required.
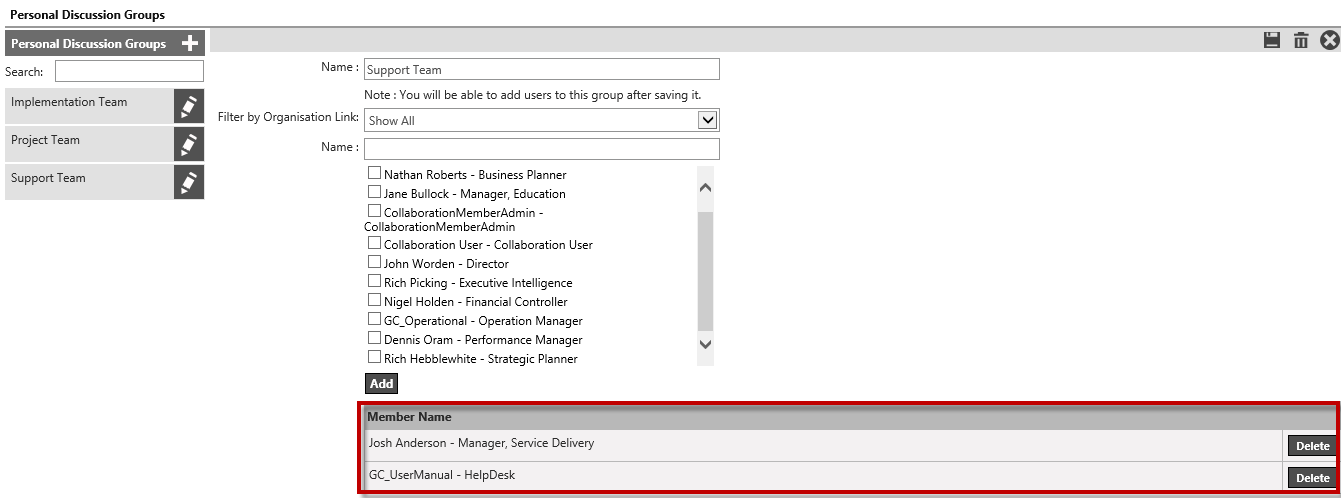
4. Click Save to complete creation.
Modify an Existing Personal Discussion Group
Click on the 'Edit' icon next to a group name. Details will be displayed. You can change group name, add new members or delete existing members as shown above.
Click Save once modified.
|
Copyright © 2014-2015 CAMMS Online Help. All rights reserved.
Last revised: September 23, 2018